mercredi 21 mai 2014

THE Lemon Cheesecake


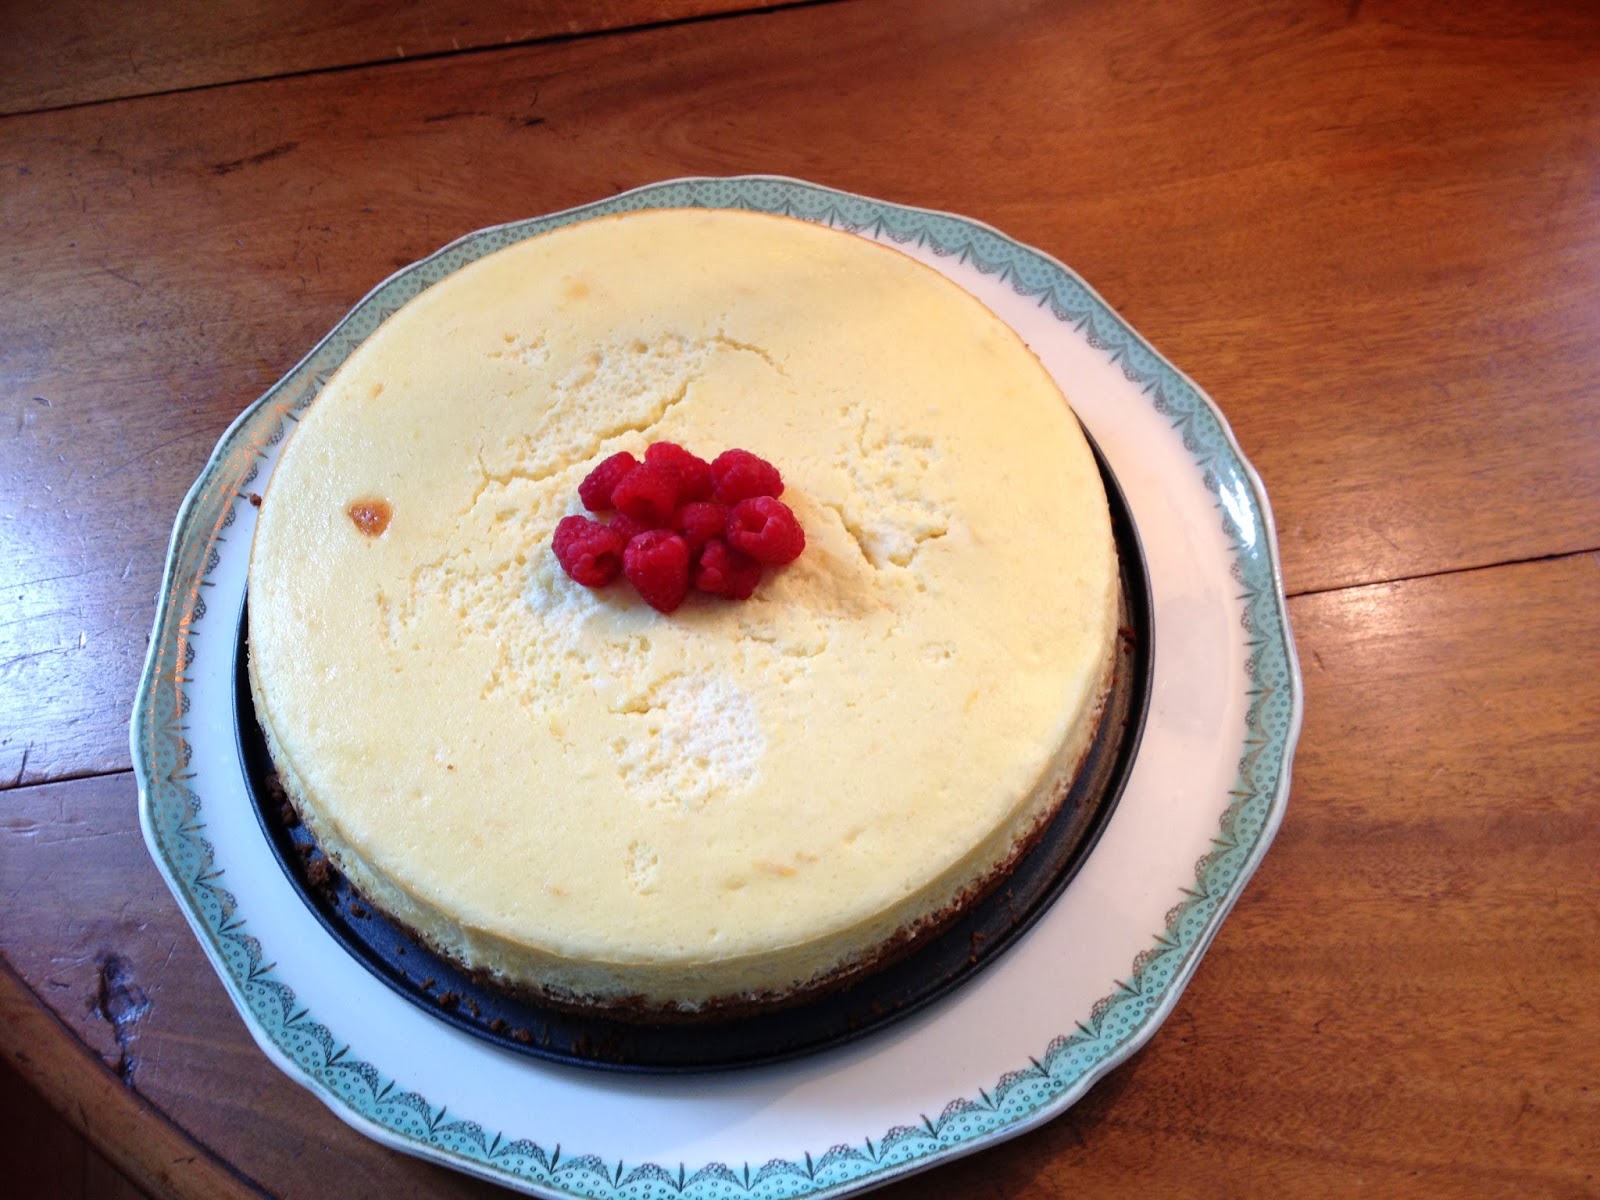
We went to Paris for the weekend, see friends and families and greeting a new baby girl to the world. A very nice break, full of great food and as you can see on the picture, some cooking.

Inspiring myself from my Aunt and Godmother M-L, and working on this recipe for years, I give you the lightest and more umami lemon cheesecake ever. No sourness, no thick, compact and heavy mouthful.

The tangy and zesty taste of lemon, combined with the softness of cream cheese and the sweetness of the crust. This is to die for.

I usually write long articles before the recipe appears but it would just be cruel in this case!

So here it is.


Ingredients:
600g of cream cheese. I use St Moret as it is slightly salty
300g of speculos/bastogne
90g of butter (that can be replaced easily with coconut oil but I haven’t tested)
170g of unrefined ugar
2 organic lemons
4 eggs (yolk separated from the white)
2 large pinches of salt


1.       Heat up the oven at 160°C on traditional oven function.
2.       Crush the speculos/bastogne.
3.       Melt the butter/coconut oil.
4.       Mix the butter with the speculos/bastogne and 20g of sugar.
5.       Butter/oil a high sided pie dish and spread the speculos mixture at the bottom. Use a glass to press the crumbs. Press well or they will mix with the dough.
6.       Keep in the fridge while you prepare the rest.
7.       Grate the zest of the two lemons.
8.       From then onwards I use a mixer but you can also do it by hand. Put the egg yolks, 100g of sugar, the cream cheese and the salt in the mixer and mix until all the ingredients are blended together. Add the lemon zest and mix a little more.
9.       Whip the whites until stiff and foamy. During the whipping process add the remaining 50g of sugar little by little. This will help keep the whites stiff.
10.   Move the creamy preparation from the mixer to a large bowl and slowly incorporate the egg whites one large spoonful at a time. I use a wooden spoon and bring the creamy mixture on top of the egg white until they are fully blended in. Don’t wait or the whites will fall down and melt back to a liquid!
11.   Once you have your light and creamy preparation, pour over the speculos bottom, in the pie dish.
12.   Cook for 40-45 minutes.
13.   Once out of the oven let the cheesecake cool down before removing the dish.


Devour cold, garnished with fruits. Strawberries, raspberries, red currants depending on the season. You’ll notice I used raspberries which are not exactly in season yet but I just couldn’t resist… 


This cheesecakes gets even better after a day or two in a sealed container in the fridge.

Let us know what you think once you’ve tried it!

R.
samedi 26 avril 2014

Kale, roasted almonds and oranges salad with a velvety garlic-chocolate-balsamic sauce


M and I live in London. It’s always moving, buzzing with life, vibrating with restaurants, bars and cafés to discover, buildings to visit, parks to loiter in… you name it, London has it! And we enjoy every minute of our life here.

Except when we don’t anymore. There always comes a point when we are longing for the smell of damp earth, the silence of nature, the ruffled noise of leaves and the appeasing greenery of the countryside. We are lucky that London has so many green spaces and parks, but it doesn’t replace a weekend in a truly rural area. 


When we lived in Paris we simply used to go to the country house for 2 days and would come back fully regenerated. As we do not have this luxury here, we made the most of our Easter weekend!


Hang in there you won’t believe it: we went camping in Northern Wales! Yep, that’s how bad we missed nature: we wanted to be alone, in the woods, far from civilisation. 


Now, it doesn’t sound very exotic, but I can assure you that there is little need to go far to see beautiful scenery, observe the busy lives of birds, sight one, no two deer during a hike and sleep among golden pheasants and woodpeckers. And don’t get me started on the sheep. No I know they are not wild, but (Northern) Wales is the land of sheep. They are everywhere! On the grass, the meadows, the roads, the gardens… And guess what!?  They are not all the same! Brown, fluffy whites, creamy, skinny, patched… all lovely and peacefully grazing in the sun with their youngsters. For my Easter I saw lambs jumping around rather than in my plate, it was refreshing  ;)


M used to be a scout, even a chief, so camping was all natural for him. Now you have to imagine that I used to be the kind of little girl who would recoil at the sight of mud and certainly wouldn’t dream of sleeping in a tent in the middle of the forest. No thank you, I was happy with my dreams of princesses and white castles.

Well nature has grown on me since then and exhausted with the urban noise, pollution and greyness (where on Earth did that White Castle go??), I arrived home one evening announcing to M that we were going wild camping for Easter weekend. He looked slightly puzzled but didn’t comment and set up to organise everything (I would have forgotten all the useful things like the pocket light or the pots and pans…what do you mean it’s pitch dark in the forest once the sun has set!??).

So off we went, randomly choosing hiking spots, walking, breathing, panting, regenerating and planting our tent where we found a nice, flat (what do you mean duh?) hidden spot in the forest.


Now I have to confess we spent the last night in a Bed & Breakfast. It was pouring rain since the middle of the afternoon and the wind was blowing wildly. I would have enjoyed the noise of the rain and the wind once I was comfy IN the tent, IN the duvet, but the prospect of pitching the tent, unpacking our bags, lighting a fire and having dinner in the downpour was not exactly alluring… BUT our B&B was lost on the far side of a lake, in the middle of nature, the owner was a lovely lady and we had an amazing Welsh/English breakfast in the sun, in very flowery china and with home-made jam. I nice end to our trip!


The following recipe is not Welsh, but I discovered it in the Green Me Up blog when we came back and it reminded me of the colours of the forest. I have modified the original recipe slightly to make it more chocolaty. Qu’est-ce que vous voulez, on ne se refait pas!


Serves 2


For the salad

4 handfuls of washed and cut kale leaves*

1 teaspoon of balsamic vinegar

½ teaspoon of walnut oil (I didn’t have walnut oil so I used olive oil instead)

1 shallot

1 orange

1 handful of roasted almonds**


For the sauce

3 plump garlic cloves (fresh garlic is the best but non fresh will be perfect too

1 teaspoon of olive oil

2 full teaspoons of creamy honey

40 ml of water

1 teaspoon of powder cocoa

30g of cooking chocolate (min 70% cocoa)

30 ml balsamic vinegar

1 teaspoon of almond purée


*Preparing the kale: cut around the stem of the kale leaves. Then cut the leaves roughly with a knife. Wash and spin the kale as you would with salad.

**Roasting almonds is probably the easiest thing ever. Just pop them into the oven, use the grill and…roast! It varies but when you start seeing cracks and smoke emanating from the nuts it’s ready. It works with hazelnuts and other nuts as well. I always make a lot and keep them in a bowl ready to use/eat.


The sauce: Peel and slice very thinly the garlic cloves. Mix the olive oil and the vinegar in the pan and heat gently. Add the garlic almost immediately and let it roast. Once it’s slightly golden turn off the heat and set aside.


In a small pot, start heating the water and once it’s warm (not boiling), add the cocoa and the chocolate. Mix on the heat until you obtain a smooth sauce. Add the balsamic vinegar and gently bring to a simmer for about 20 seconds. The sauce should never boil to avoid cooking the chocolate. Keep mixing often during the process.


Turn off the heat and add in the almond puree and the garlic with the honey and olive oil sauce. Mix well and keep it aside to let it cool down and thicken.

In the meantime, prepare the salad.


The salad: Energetically massage the kale with the teaspoon of balsamic vinegar and the ½ teaspoon of oil for 5-10 minutes. Cut the shallot in small pieces. Peel the orange and separate the segments. Cut them in half. Roughly cut the roasted almonds into smaller pieces. Mix all the salad ingredients.


jeudi 17 avril 2014

Exotic Chocolate Coco Bar


Chocolate Coco Bar


Ok it looks like I use another name to talk about a Bounty. That’s right because I tried to reproduce it. A homemade version with no extra unnecessary ingredients and where the coco has a genuine natural taste, which is stronger than the sugar.

Weeks ago we bought a Coconut (a real one), just for the fun of it, and that’s where it all began.
How to open a coconut? We looked at different internet videos. Apparently, one good method is to use the opposite side of the blade of a large knife. Use it to repeatedly give some blows on one line around the coconut. You will create a crack in the coconut which will eventually break. Catch the water in a glass for yourself.  To be honest we did it the amateur way, with repeated blows with the blade. It worked but there were bits of wood in the coconut and we couldn’t really keep the juice.
We had a few bits. It’s much more acid than the coco taste we are used to so we left a lot of it in the fridge for a few days, wondering what to do with it. The coconut started to dry. And that’s when it’s ready for the Chocolate Coco Bar.


Ingredients for 7 (plump) bars:

-          200 g grated coconut

-          200 g sweetened  condensed milk

-          100 g black chocolate (you can have milk one but dark is much much better)

-          20 g butter

Mix the grated coconut with the sweetened condensed milk in a bowl.
Make some sausage-shaped rolls of about 7 cm / 3 cm. Place the preparation in a frozen plate. This is not easy because of the sugar in the milk. All your fingers will be sticky.
Place in the freezer for minimum 2 hours.


Put the chocolate and butter in a bowl and mix in a bain-marie to make it liquid (I cheated by using the microwave). I used two chopsticks to soak the coco bars into the chocolate. Then put the bars back to the frozen plate.


Just time to have diner and the bars where ready!
Delicious!
M.
Chocolate Coco Bar